type: custom:button-card
entity: light.maison
name: Maison
show_state: true
state_display: >
  [[[ return
  `${parseFloat(states['sensor.lywsd03mmc_0945_temperature'].state).toFixed(0)}`
  + ' °C'

  + ` |
  ${parseFloat(states['sensor.lywsd03mmc_0945_temperature'].state).toFixed(0)}`
  + ' °C'

  + ` |
  ${parseFloat(states['sensor.lywsd03mmc_0945_temperature'].state).toFixed(0)}`
  + ' °C';

  ]]]
icon: mdi:home
size: 50%
state:
  - value: 'on'
    color: yellow
  - value: 'off'
    color: blue
  - opacity: 0.4
styles:
  icon:
    - transform: rotate(20deg)
    - position: absolute
    - left: '-15%'
    - top: 25%
  name:
    - color: blue
    - top: 5%
    - left: 5%
    - font-size: 20px
    - font-weight: bold
    - position: absolute
  state:
    - color: gray
    - top: 25%
    - left: 5%
    - font-size: 14px
    - position: absolute
  card:
    - height: 120px
  custom_fields:
    icone1:
      - top: 46%
      - left: 18%
      - width: 30px
      - position: absolute
    icone2:
      - top: 46%
      - left: 25%
      - width: 30px
      - position: absolute
tap_action:
  action: navigate
  navigation_path: /dashboard-pixel/lumieres
hold_action:
  action: toggle
custom_fields:
  icone1:
    card:
      type: custom:button-card
      icon: mdi:cellphone-marker
      show_name: false
      color: green
      size: 80%
  icone2:
    card:
      type: custom:button-card
      icon: mdi:cellphone-marker
      show_name: false
      color: red
      size: 80%
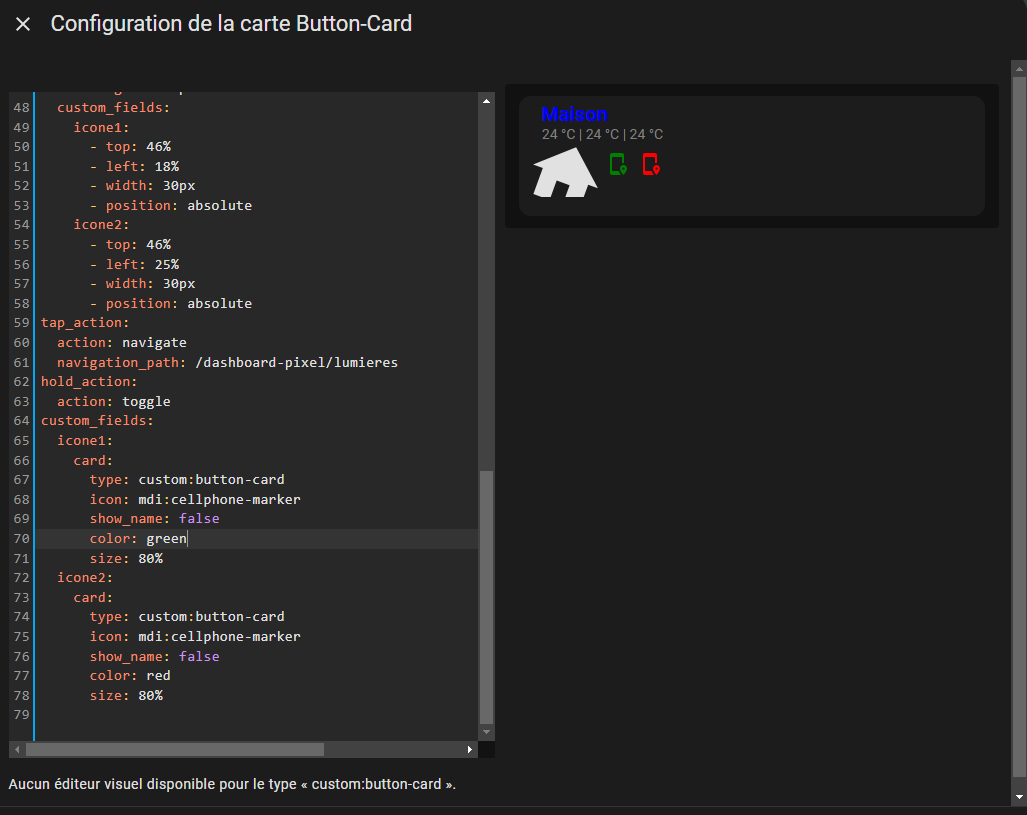
Tu ajoutes custom_field: au même niveau que name, entity.
Tu choisis un nom que tu vas donner au custom_filed ( ex icone1 ) :
custom_fields:
  icone1:
    card:
      type: custom:button-card
      icon: mdi:cellphone-marker
      show_name: false
      color: green
      size: 80%
Il faut ensuite déclarer ce custom_field dans styles pour le positionnement.
styles:
  custom_fields:
    icone1:
      - top: 46%
      - left: 18%
      - width: 30px
      - position: absolute
La doc pour t’aider, tu as des explication et exemple pour le custom_field.