Bonjour à tous !
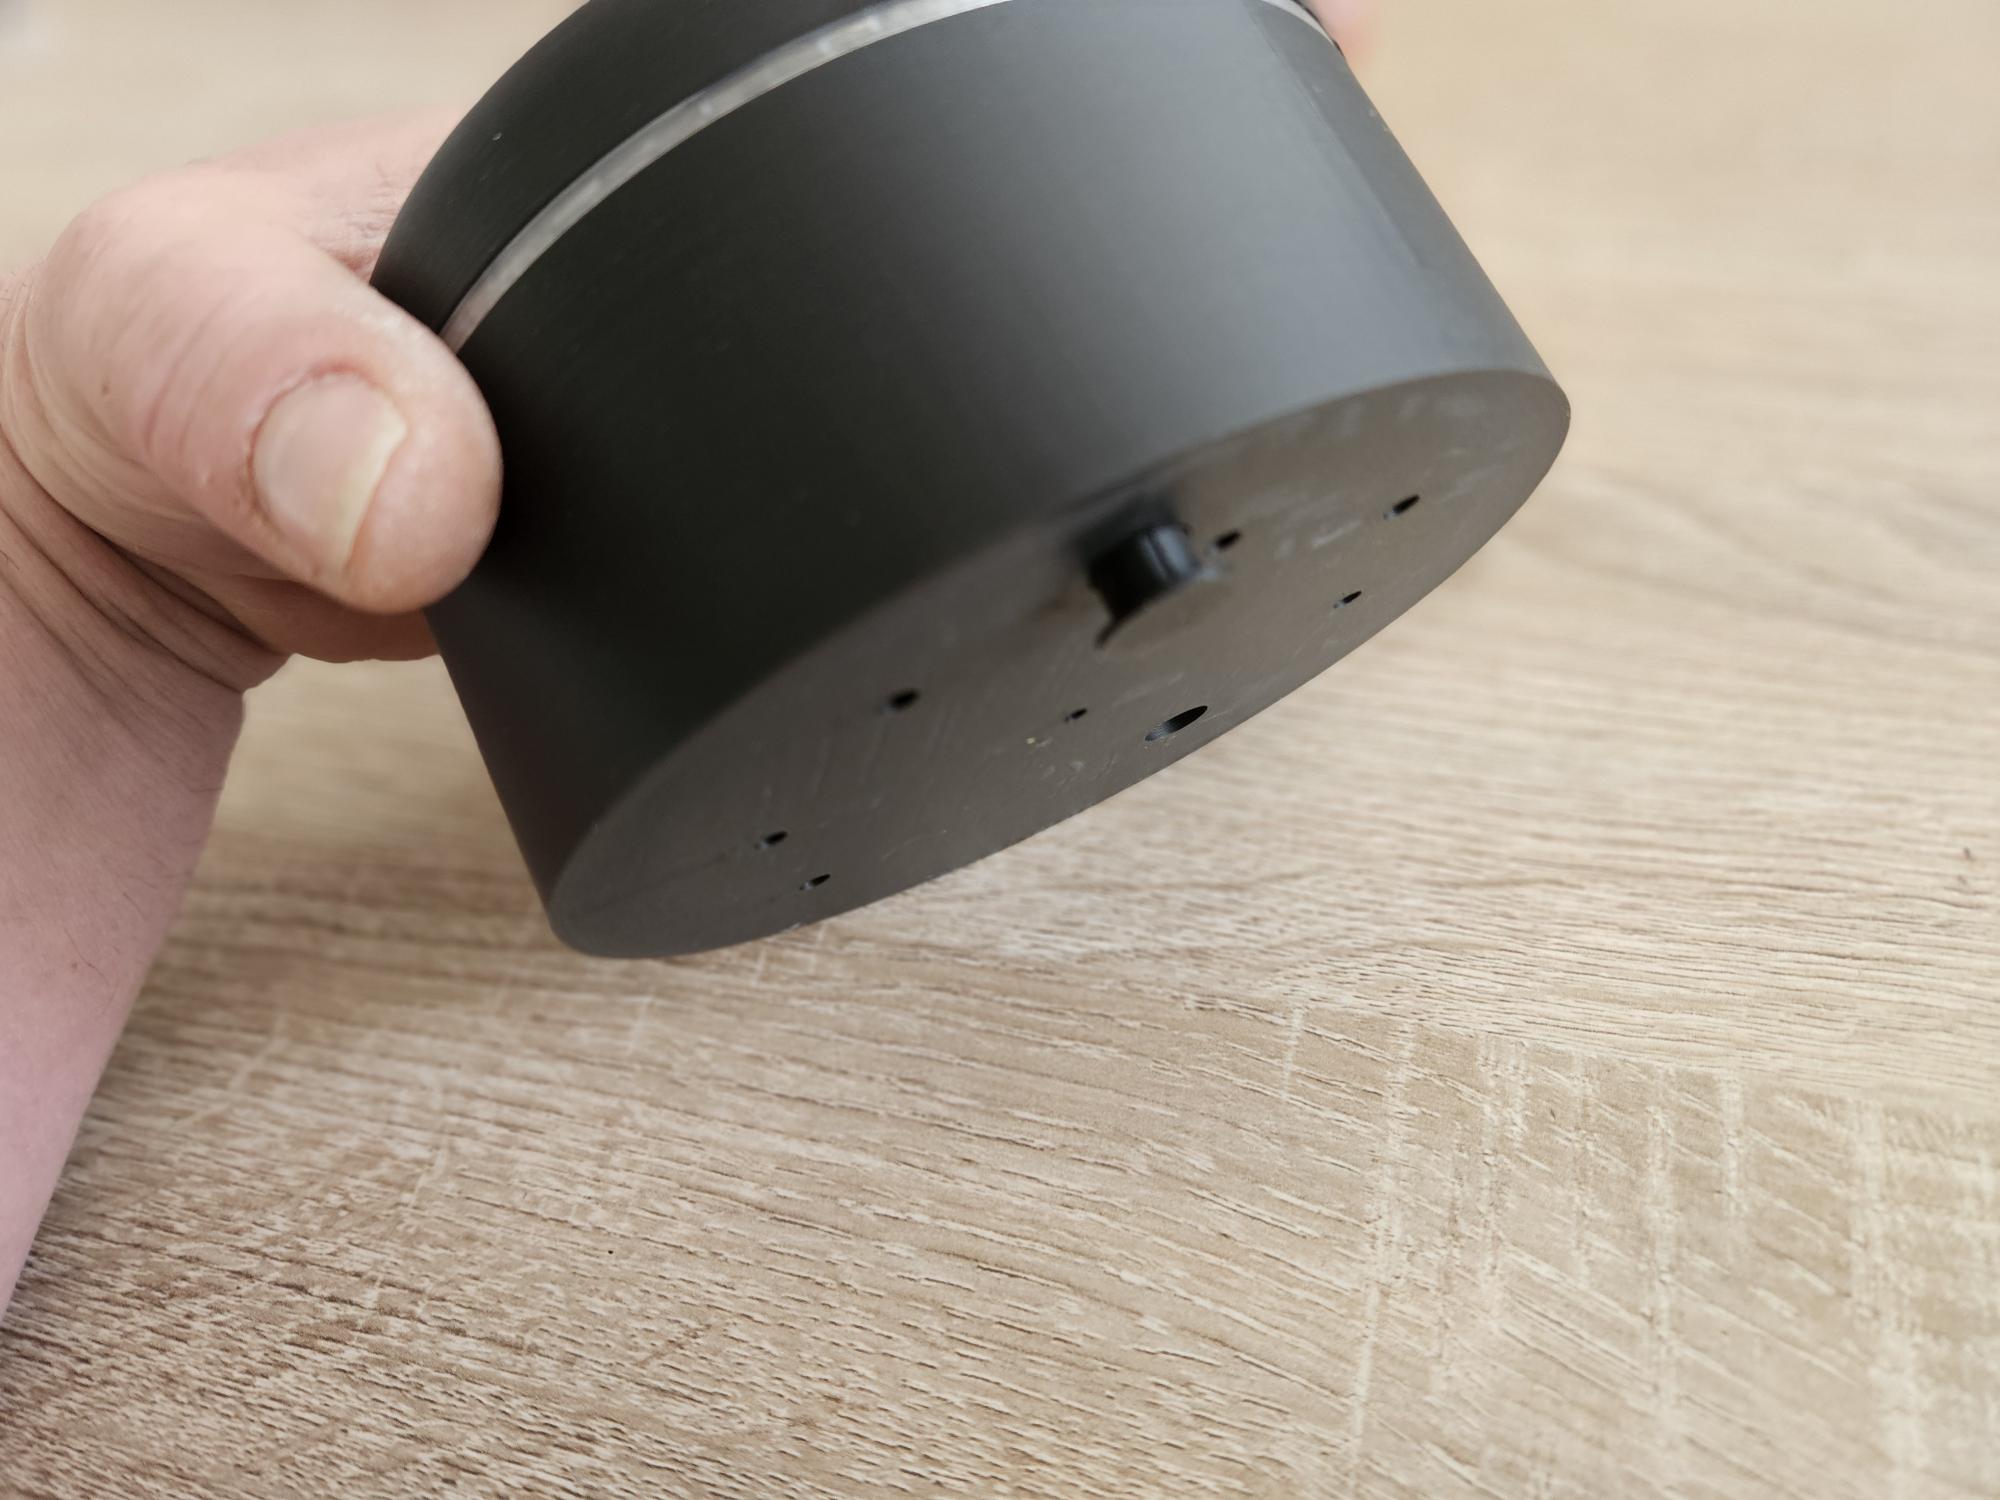
Je vous présente mon projet de sirène Zigbee 100% locale, conçue autour d’un ESP32-H2. Contrairement aux sirènes du commerce souvent limitées, ce module est alimenté en 220V et combine plusieurs fonctions pour renforcer votre réseau Zigbee et votre sécurité. Peut être fixer au mur ou posé sur un meuble.

 Points forts :
- Mode Zigbee Router (ZR) : Agit comme un répéteur puissant pour maillage (jusqu’à 20 enfants).
- Multi-Endpoints :
-
- Sirène (Relais),
- Sirène (Relais),
-
- Autoprotection (Tamper),
- Autoprotection (Tamper),
-
- État de l’armement,
- État de l’armement,
-
- Range Extender.
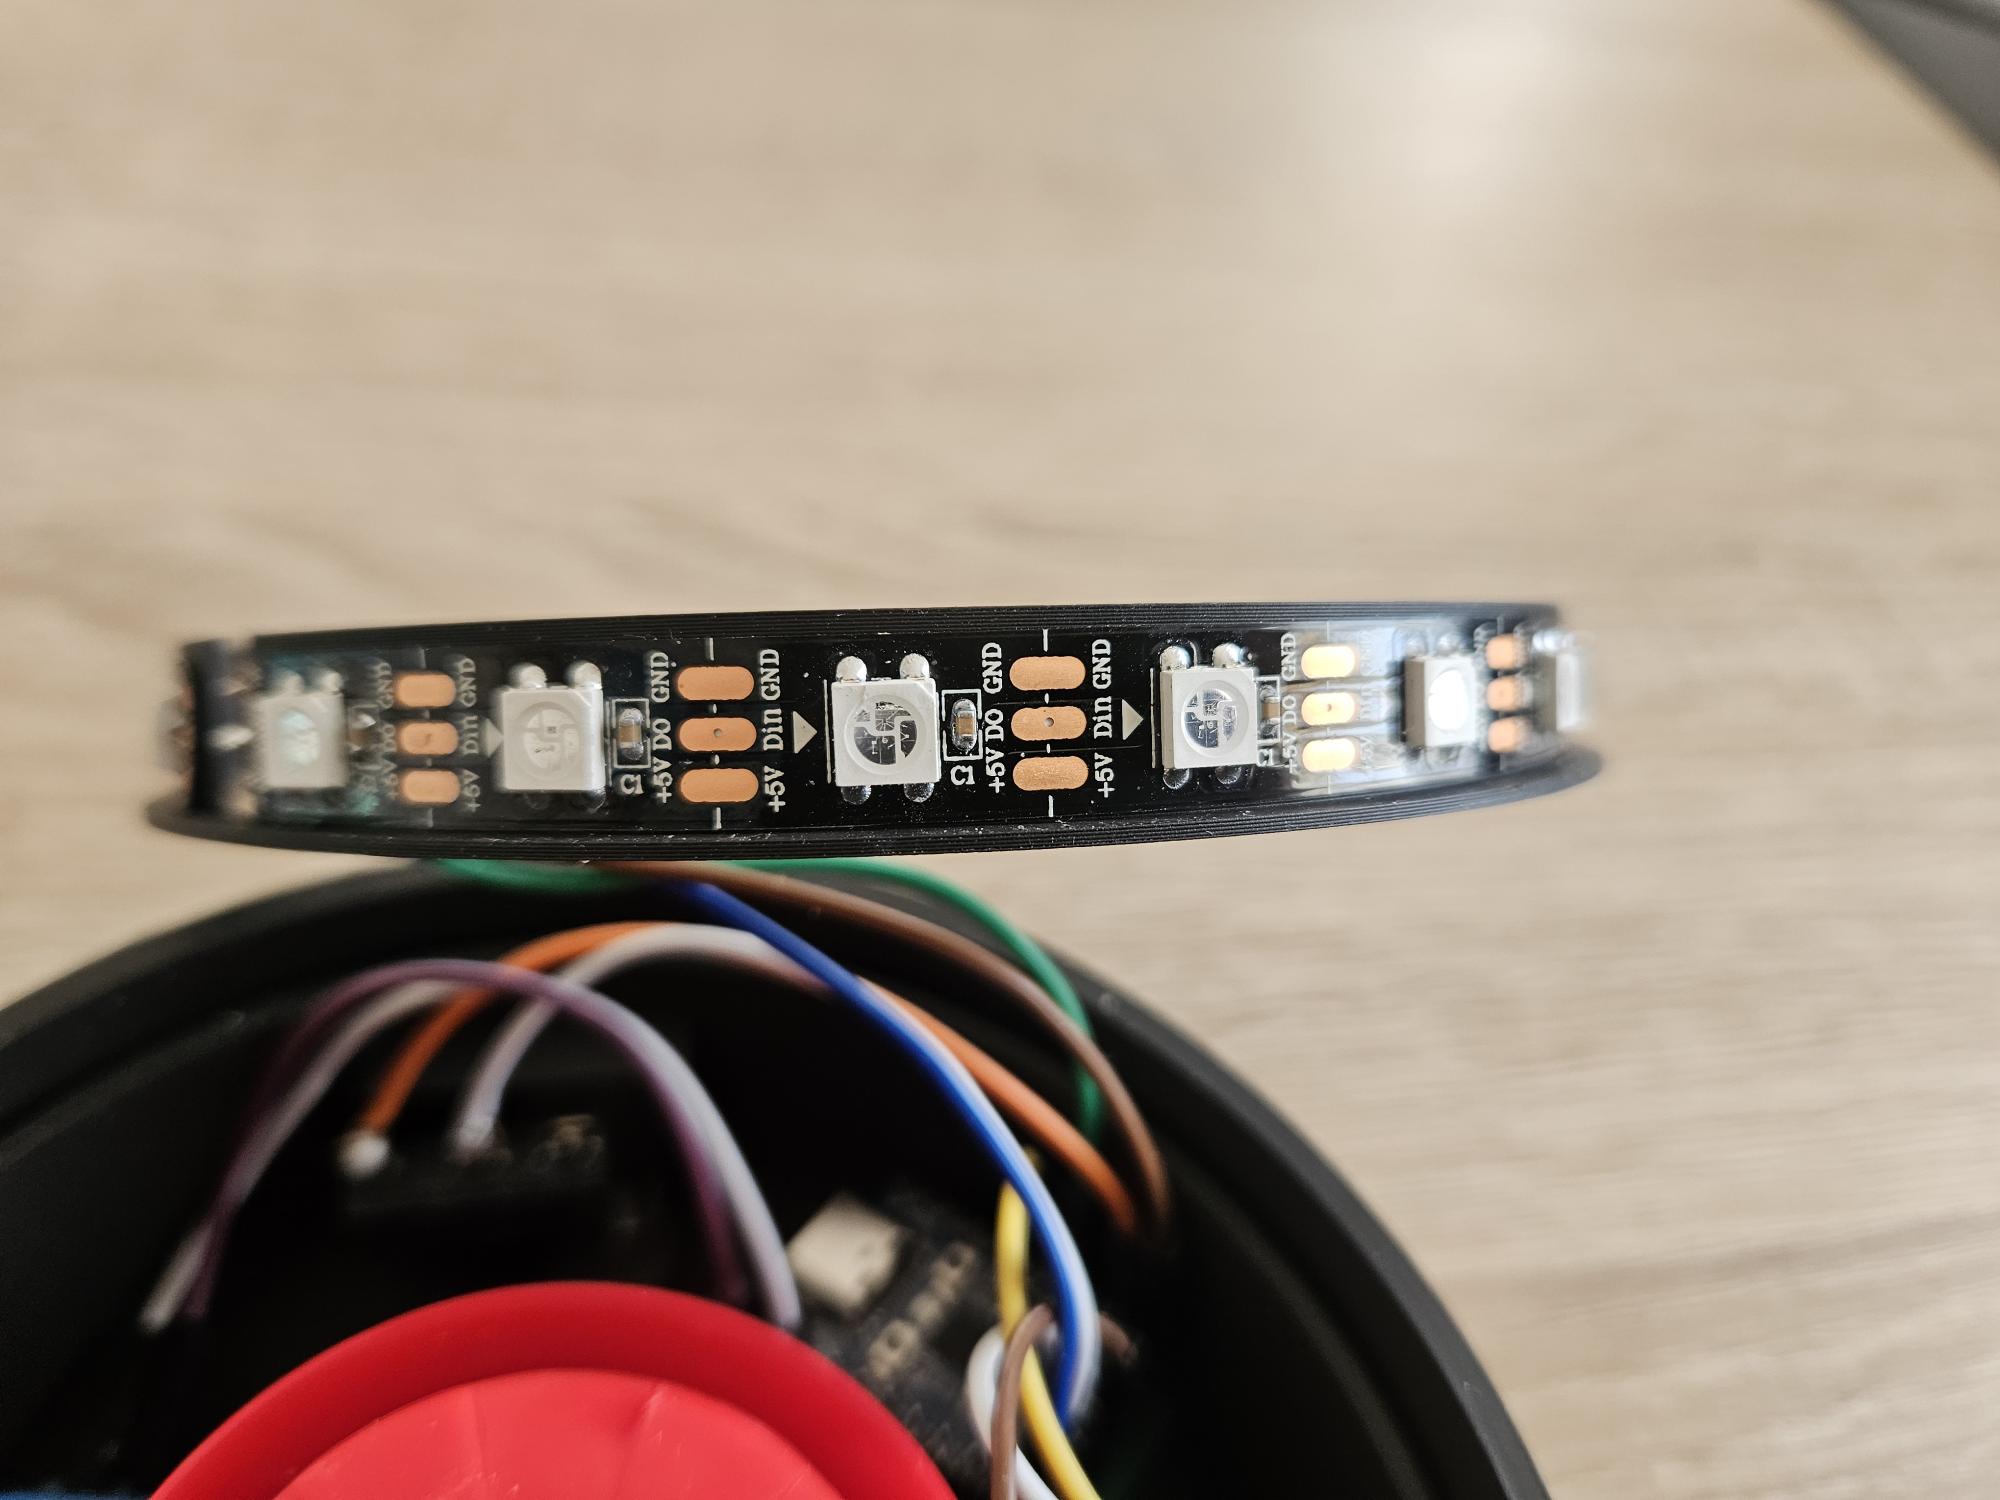
- Retour Visuel : 20 LEDs WS2812B pour des animations (Armé/Désarmé/Alerte).
- Puissance : Pilotage d’un Buzzer filaire 220V 120dB via relais.
- Intégration Alarmo : Entièrement compatible avec l’intégration Alarmo sous Home Assistant.

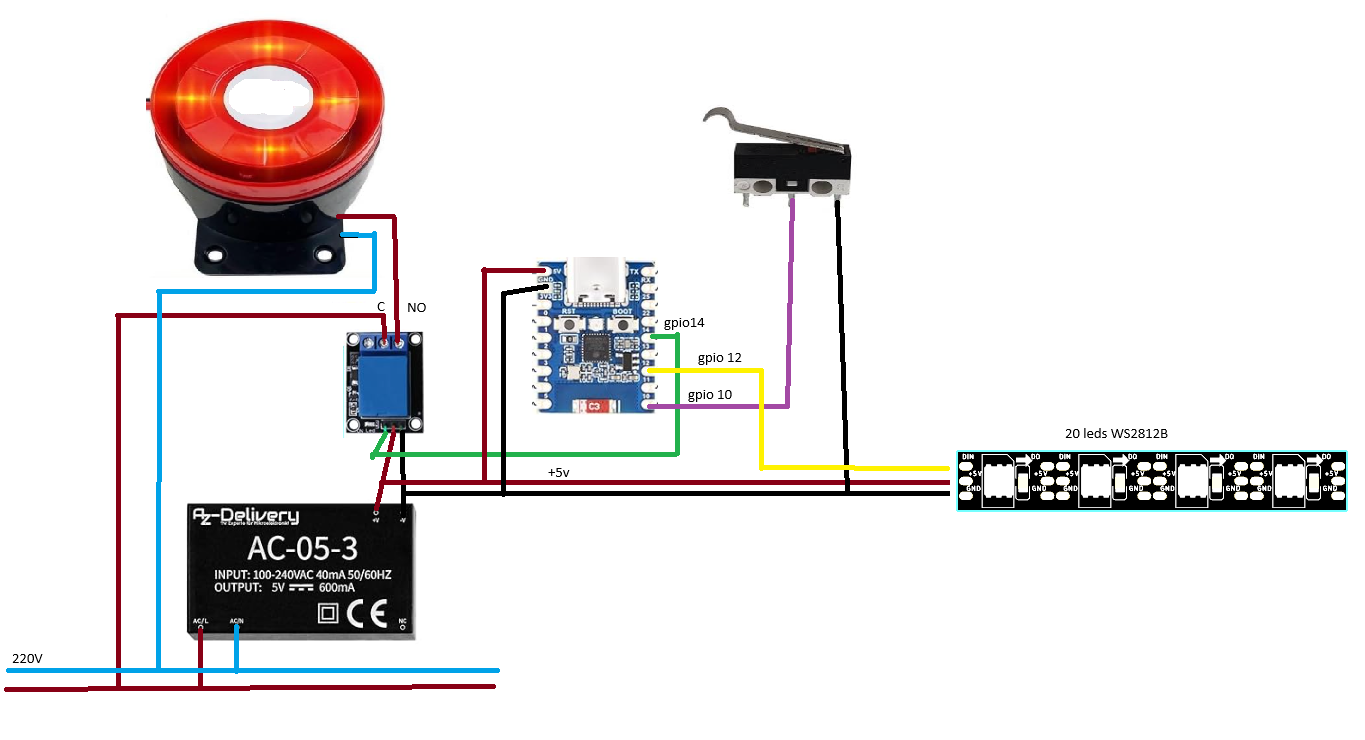
 Matériel utilisé :
- Microcontrôleur : ESP32-H2 Mini Development
- Alimentation : Module AC-DC 220V → 5V (type HLK-PM01).
- Actionneur : Module relais 5V pour couper/allumer le 220V de la sirène.
- ** Buzzer :** Sirène d’Alarme Extérieure 220V
- Signalisation : bandeau de 20 LEDs WS2812B (Neopixel).
- Sécurité : Micro-switch pour la détection d’ouverture du boîtier (Tamper).
 Le Code (Arduino IDE) :
Le code utilise la bibliothèque officielle ESP32 Zigbee. Il configure l’appareil comme un routeur avec une configuration personnalisée pour maximiser le nombre d’appareils enfants.
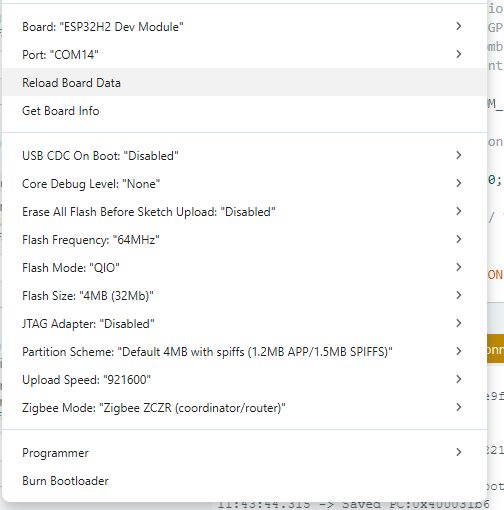
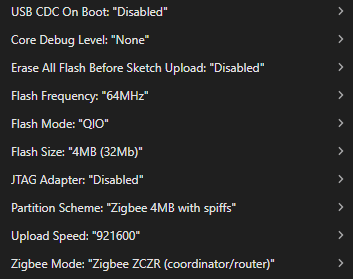
Configuration Arduino IDE :
- Board : ESP32H2 Dev Module
- Zigbee Mode : Zigbee Router (ZCZR)
👉 Cliquez pour voir le code documenté complet
/**
- Projet : ZigbeeSireneMulti par CyrilTech
- Description : Sirène Zigbee avec ruban LED NeoPixel, capteur (Tamper)
- et mode répétiteur 10 à 20 clients max (Extender).
*/
#ifndef ZIGBEE_MODE_ZCZR
#error « Zigbee router mode is not selected in Tools->Zigbee mode »
#endif
/** Bibliothéque */
#include « Zigbee.h »
#include <Preferences.h>
#include <Adafruit_NeoPixel.h>
/** Neopixel leds configuration */
#define PIXEL_PIN 12 // Le GPIO pour les WS2812B
#define NUM_PIXELS 20 // Nombre de LEDs
#define BRIGHTNESS 250 // Intensité lumineuse (0 à 255)
Adafruit_NeoPixel pixels(NUM_PIXELS, PIXEL_PIN, NEO_GRB + NEO_KHZ800);
/** Variables pour l’animation sans blocage */
bool sirenActive = false;
unsigned long lastUpdate = 0;
int animationStep = 0;
const int interval = 250; // Vitesse de clignotement en millisecondes
/** Zigbee configuration */
#define USE_CUSTOM_ZIGBEE_CONFIG 1
/** Configuration des 4 ENDPOINT */
#define ZIGBEE_OUTLET_ENDPOINT 1 // Relais 5v/220v pour buzzer
#define CONTACT_SWITCH_ENDPOINT_NUMBER 2 // Contact pour tamper
#define ARMING_ENDPOINT_NUMBER 3 // Led pour signalisation
#define ZIGBEE_EXTENDER_ENDPOINT 4 // routeur zigbee
/** Déclaration des variables */
uint8_t led = LED_BUILTIN; // led d’association
uint8_t button = BOOT_PIN; // boutton association zigbee > à 3 secondes pour relancer la recherche
uint8_t sensor_pin = 10; // détection tamper
uint8_t ledPin = 14; // RELAIS 5V
bool systemArmed = false; // État de l’armement (Armé/Désarmé)
ZigbeePowerOutlet zbOutlet = ZigbeePowerOutlet(ZIGBEE_OUTLET_ENDPOINT);
ZigbeeContactSwitch zbContactSwitch = ZigbeeContactSwitch(CONTACT_SWITCH_ENDPOINT_NUMBER);
ZigbeePowerOutlet zbArmingSwitch = ZigbeePowerOutlet(ARMING_ENDPOINT_NUMBER);
ZigbeeRangeExtender zbExtender = ZigbeeRangeExtender(ZIGBEE_EXTENDER_ENDPOINT);
/** Crée une tâche lors de l’appel d’identification pour gérer la fonction d’identification */
void identify(uint16_t time) {
static uint8_t blink = 1;
log_d(« Identify called for %d seconds », time);
if (time == 0) {
digitalWrite(led, LOW);
return;
}
digitalWrite(led, blink);
blink = !blink;
}
/** Crée une fonction pour les leds en mode alarme */
void setLED(bool value) {
sirenActive = value;
digitalWrite(ledPin, value ? HIGH : LOW);
if (!sirenActive) {
pixels.clear();
pixels.show();
}
}
/** Crée une fonction pour les leds armement désarmement 3 flash */
void showConfirmation(uint32_t color) {
for (int blink = 0; blink < 3; blink++) {
for (int i = 0; i < NUM_PIXELS; i++) {
pixels.setPixelColor(i, color);
}
pixels.show();
delay(150);
pixels.clear();
pixels.show();
delay(150);
}
}
/** Crée une fonction pour le flash des leds orange et vert ici on modifie la couleur */
void onArmingChange(bool value) {
systemArmed = value;
if (systemArmed) {
showConfirmation(pixels.Color(255, 126, 0)); // Flash ORANGE = Armé
} else {
showConfirmation(pixels.Color(0, 255, 0)); // Flash VERT = Désarmé
// Sécurité : Si on désarme, on coupe aussi la sirène au cas où
sirenActive = false;
digitalWrite(ledPin, LOW);
pixels.clear();
pixels.show();
}
Serial.printf(« Système d’alarme : %s\n », systemArmed ? « ARME » : « DESARME »);
}
/** Préférences pour stocker l’indicateur ENROLLED afin qu’il persiste après les redémarrages */
Preferences preferences;
//* Setup */
void setup() {
Serial.begin(115200);
// init leds neopixels
pixels.begin(); // Initialise le ruban
pixels.show(); // Éteint tout par défaut
pixels.setBrightness(BRIGHTNESS);
// Init entrées
pinMode(ledPin, OUTPUT);
digitalWrite(ledPin, LOW);
pinMode(button, INPUT_PULLUP);
pinMode(sensor_pin, INPUT_PULLUP);
// Init ENROOLED
preferences.begin(« Zigbee », false); // Save ENROLLED flag in flash so it persists across reboots
bool enrolled = preferences.getBool(« ENROLLED »); // Get ENROLLED flag from preferences
preferences.end();
// Set Zigbee device name and model
zbContactSwitch.setManufacturerAndModel(« CyrilTech », « ZigbeeSireneMulti »);
zbContactSwitch.setHardwareVersion(1);
zbExtender.onIdentify(identify);
// Set callback function for power outlet change
zbOutlet.onPowerOutletChange(setLED);
zbArmingSwitch.onPowerOutletChange(onArmingChange);
// Set endpoint
Zigbee.addEndpoint(&zbOutlet);
Zigbee.addEndpoint(&zbContactSwitch);
Zigbee.addEndpoint(&zbArmingSwitch);
Zigbee.addEndpoint(&zbExtender);
// Set config Zigbee max clients à modifier max 20 préconisé entre 10 et 15
#if USE_CUSTOM_ZIGBEE_CONFIG
// Optional: Create a custom Zigbee configuration for Zigbee Extender
esp_zb_cfg_t zigbeeConfig = ZIGBEE_DEFAULT_ROUTER_CONFIG();
zigbeeConfig.nwk_cfg.zczr_cfg.max_children = 20; // 10 is default
// When all EPs are registered, start Zigbee with custom config
if (!Zigbee.begin(&zigbeeConfig)) {
#else
// When all EPs are registered, start Zigbee as ROUTER device
if (!Zigbee.begin(ZIGBEE_ROUTER)) {
#endif
Serial.println(« Zigbee failed to start! »);
Serial.println(« Rebooting… »);
ESP.restart();
}
Serial.println(« Connecting to network »);
while (!Zigbee.connected()) {
Serial.print(« . »);
delay(100);
}
Serial.println();
// Check if device has been enrolled before restarting - if so, restore IAS Zone enroll, otherwise request new IAS Zone enroll
if (enrolled) {
Serial.println(« Device has been enrolled before - restoring IAS Zone enrollment »);
zbContactSwitch.restoreIASZoneEnroll();
} else {
Serial.println(« Device is factory new - first time joining network - requesting new IAS Zone enrollment »);
zbContactSwitch.requestIASZoneEnroll();
}
while (!zbContactSwitch.enrolled()) {
Serial.print(« . »);
delay(100);
}
Serial.println();
Serial.println(« Zigbee enrolled successfully! »);
// Store ENROLLED flag only if this was a new enrollment (previous flag was false)
// Skip writing if we just restored enrollment (flag was already true)
if (!enrolled) {
preferences.begin(« Zigbee », false);
preferences.putBool(« ENROLLED », true); // set ENROLLED flag to true
preferences.end();
Serial.println(« ENROLLED flag saved to preferences »);
}
}
/** Loop */
void loop() {
// Gestion détection tamper
static bool contact = false;
if (digitalRead(sensor_pin) == HIGH && !contact) {
// Update contact sensor value
zbContactSwitch.setOpen();
contact = true;
} else if (digitalRead(sensor_pin) == LOW && contact) {
zbContactSwitch.setClosed();
contact = false;
}
// Gestion button reset association
if (digitalRead(button) == LOW) { // Push button pressed
delay(100);
int startTime = millis();
while (digitalRead(button) == LOW) {
delay(50);
if ((millis() - startTime) > 3000) {
// If key pressed for more than 3secs, factory reset Zigbee and reboot
Serial.println(« Resetting Zigbee to factory and rebooting in 1s. »);
// Clear the ENROLLED flag from preferences
preferences.begin(« Zigbee », false);
preferences.putBool(« ENROLLED », false); // set ENROLLED flag to false
preferences.end();
Serial.println(« ENROLLED flag cleared from preferences »);
delay(1000);
Zigbee.factoryReset();
}
}
}
// Animation des segments peut être modifié par nimporte quelle animation à 20 leds ici clignote en rouge 255.0.0
if (sirenActive) {
unsigned long currentMillis = millis();
if (currentMillis - lastUpdate >= interval) {
  lastUpdate = currentMillis;
  pixels.clear();

  if (animationStep == 0) {
    // Allume segments 1 (0-4) et 3 (10-14)
    for (int i = 0; i < 5; i++) { pixels.setPixelColor(i, pixels.Color(255, 0, 0)); }
    for (int i = 10; i < 15; i++) { pixels.setPixelColor(i, pixels.Color(255, 0, 0)); }
    animationStep = 1;
  } else {
    // Allume segments 2 (5-9) et 4 (15-19)
    for (int i = 5; i < 10; i++) { pixels.setPixelColor(i, pixels.Color(255, 0, 0)); }
    for (int i = 15; i < 20; i++) { pixels.setPixelColor(i, pixels.Color(255, 0, 0)); }
    animationStep = 0;
  }
  pixels.show();
}
}
delay(10);
}
 Montage & Intégration :
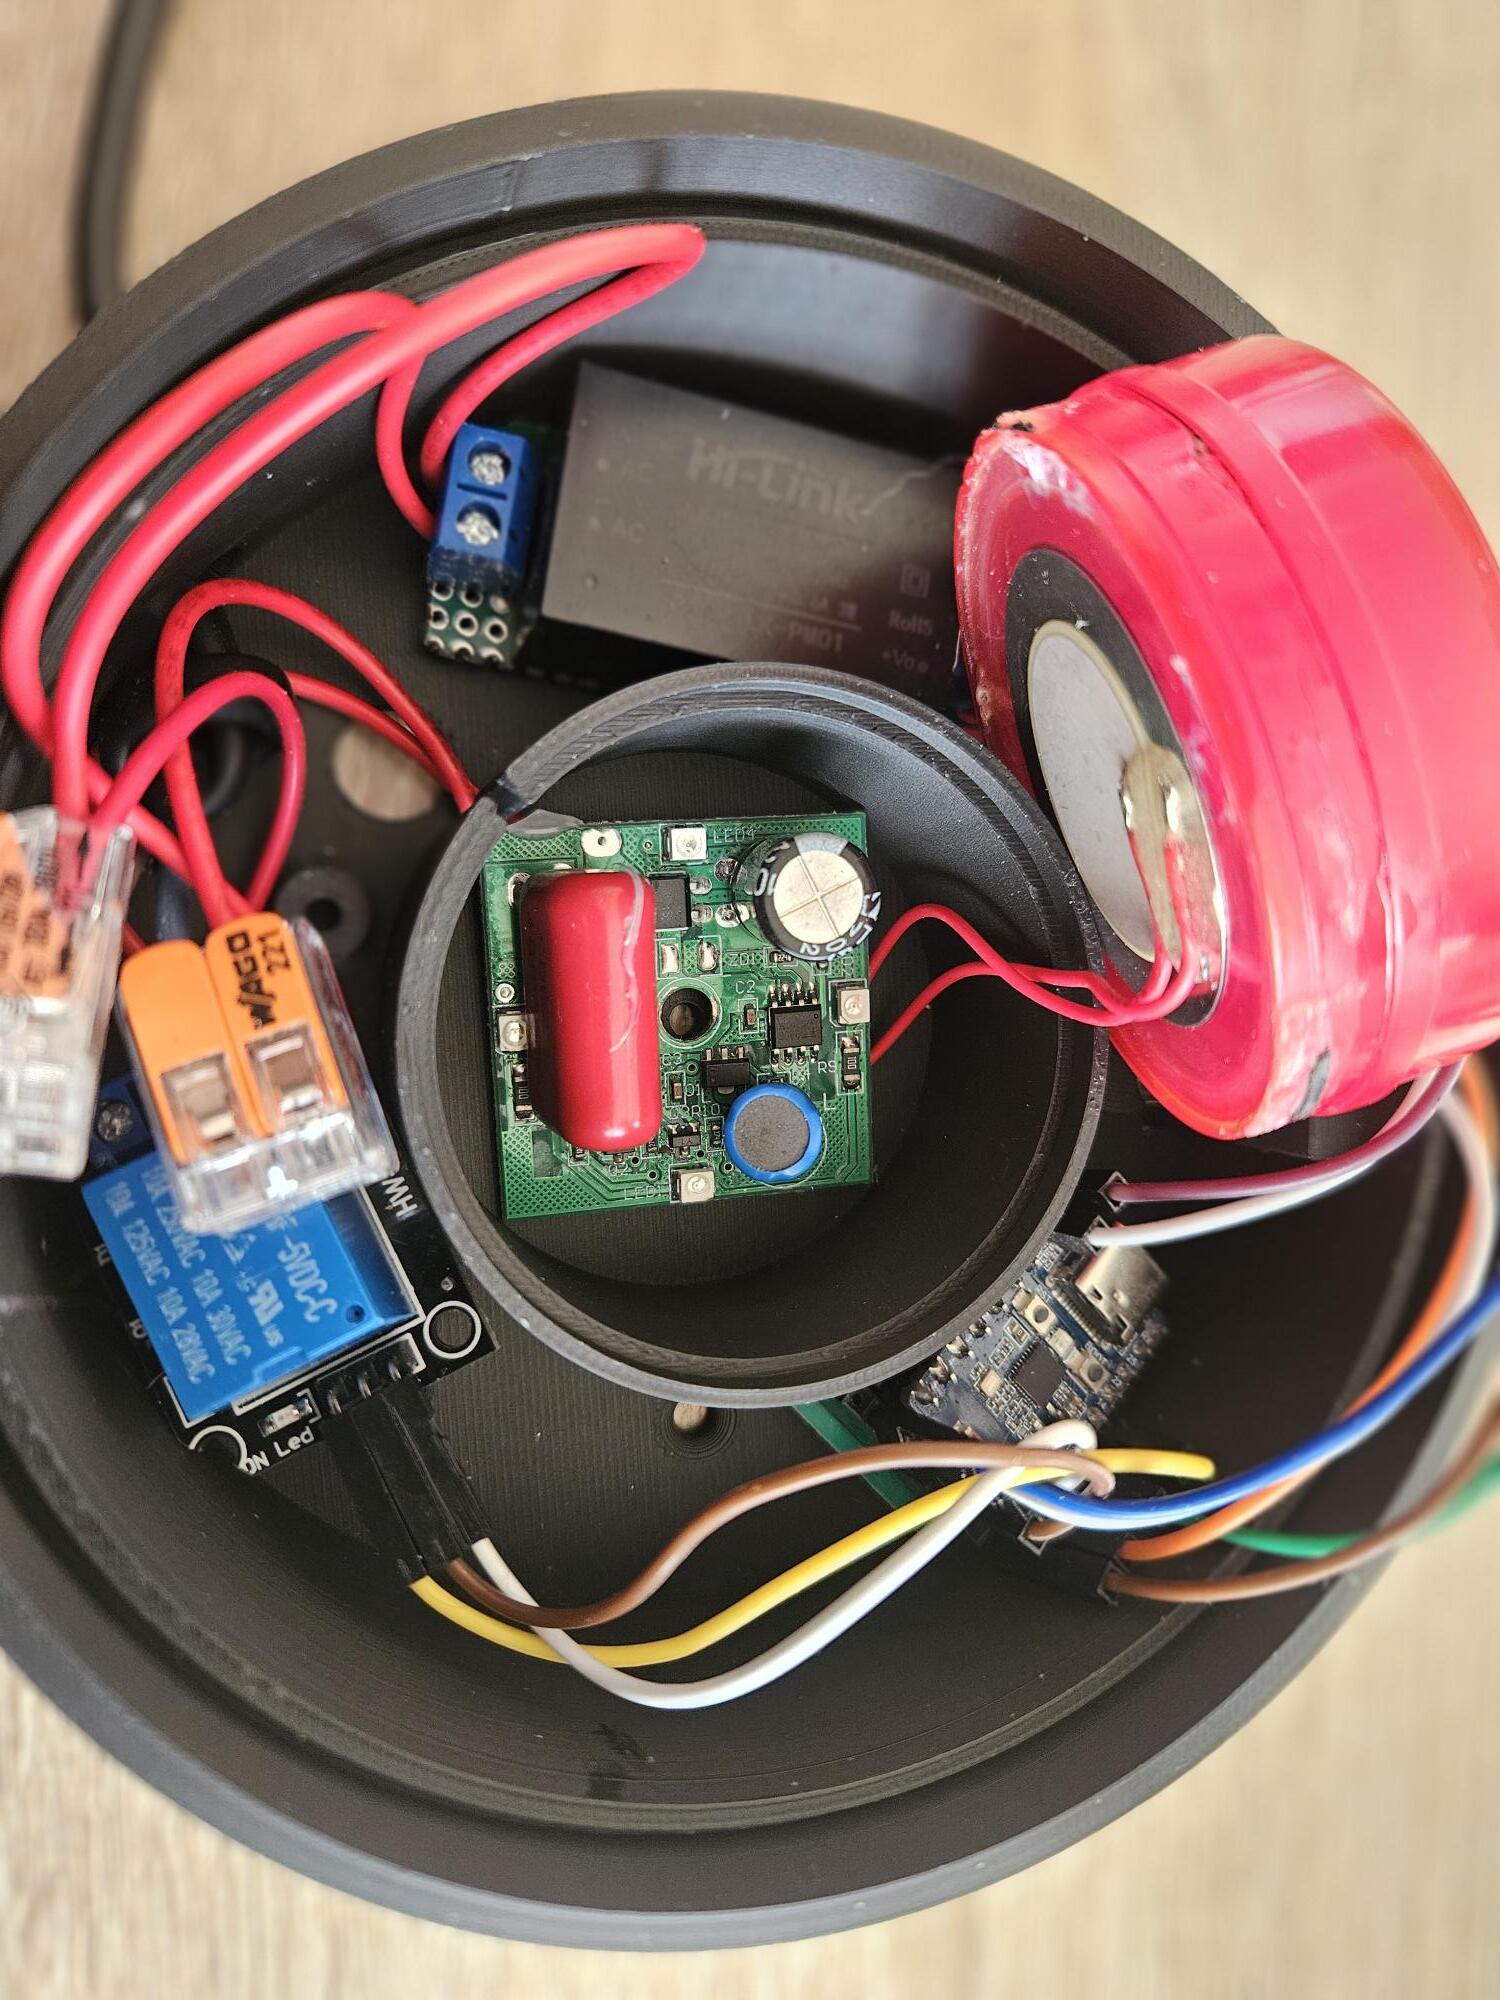
1. PCB & Boîtier : J’ai intégré sur une plaque d’essai les composants et un boîtier sur mesure via Fusion 360 (imprimé en 3D).
** fichiers STL dispo sur thingiverse : https://www.thingiverse.com/thing:7304087
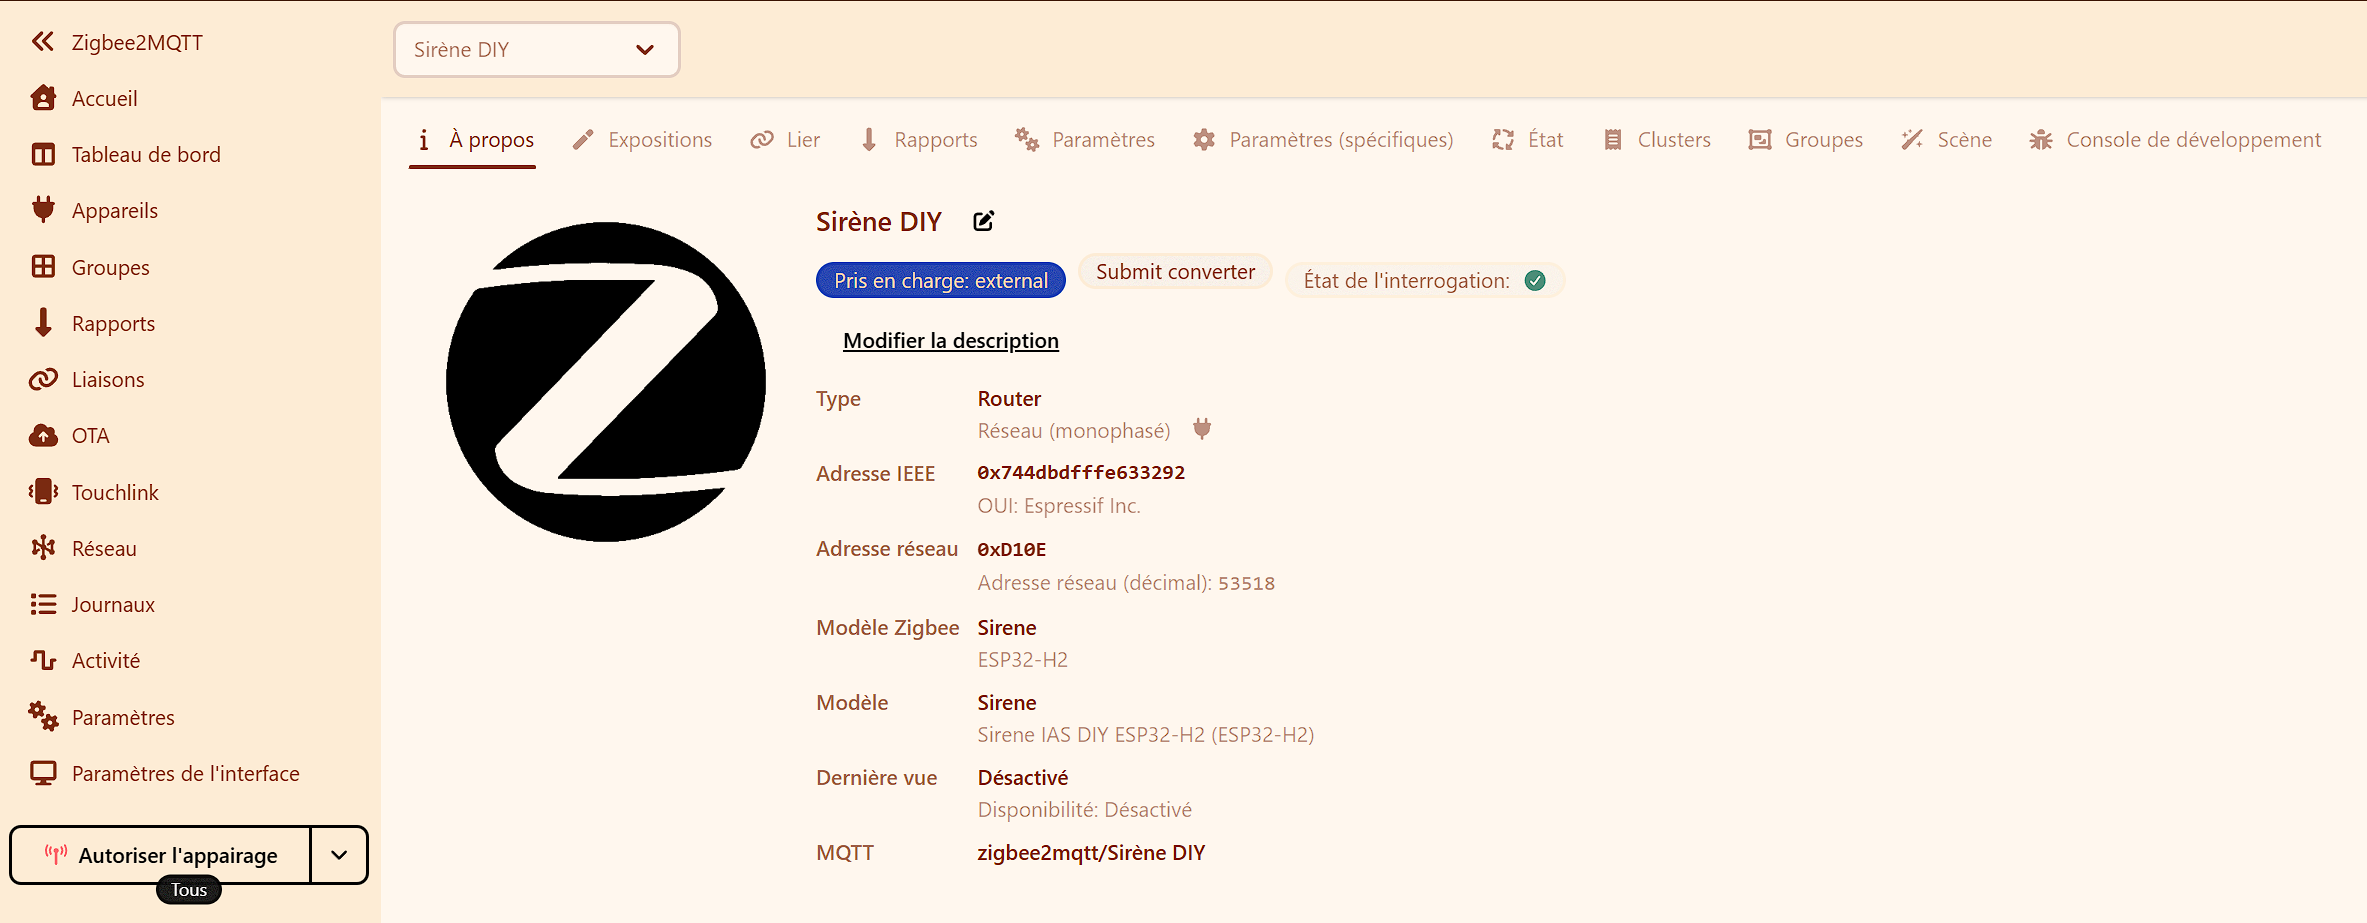
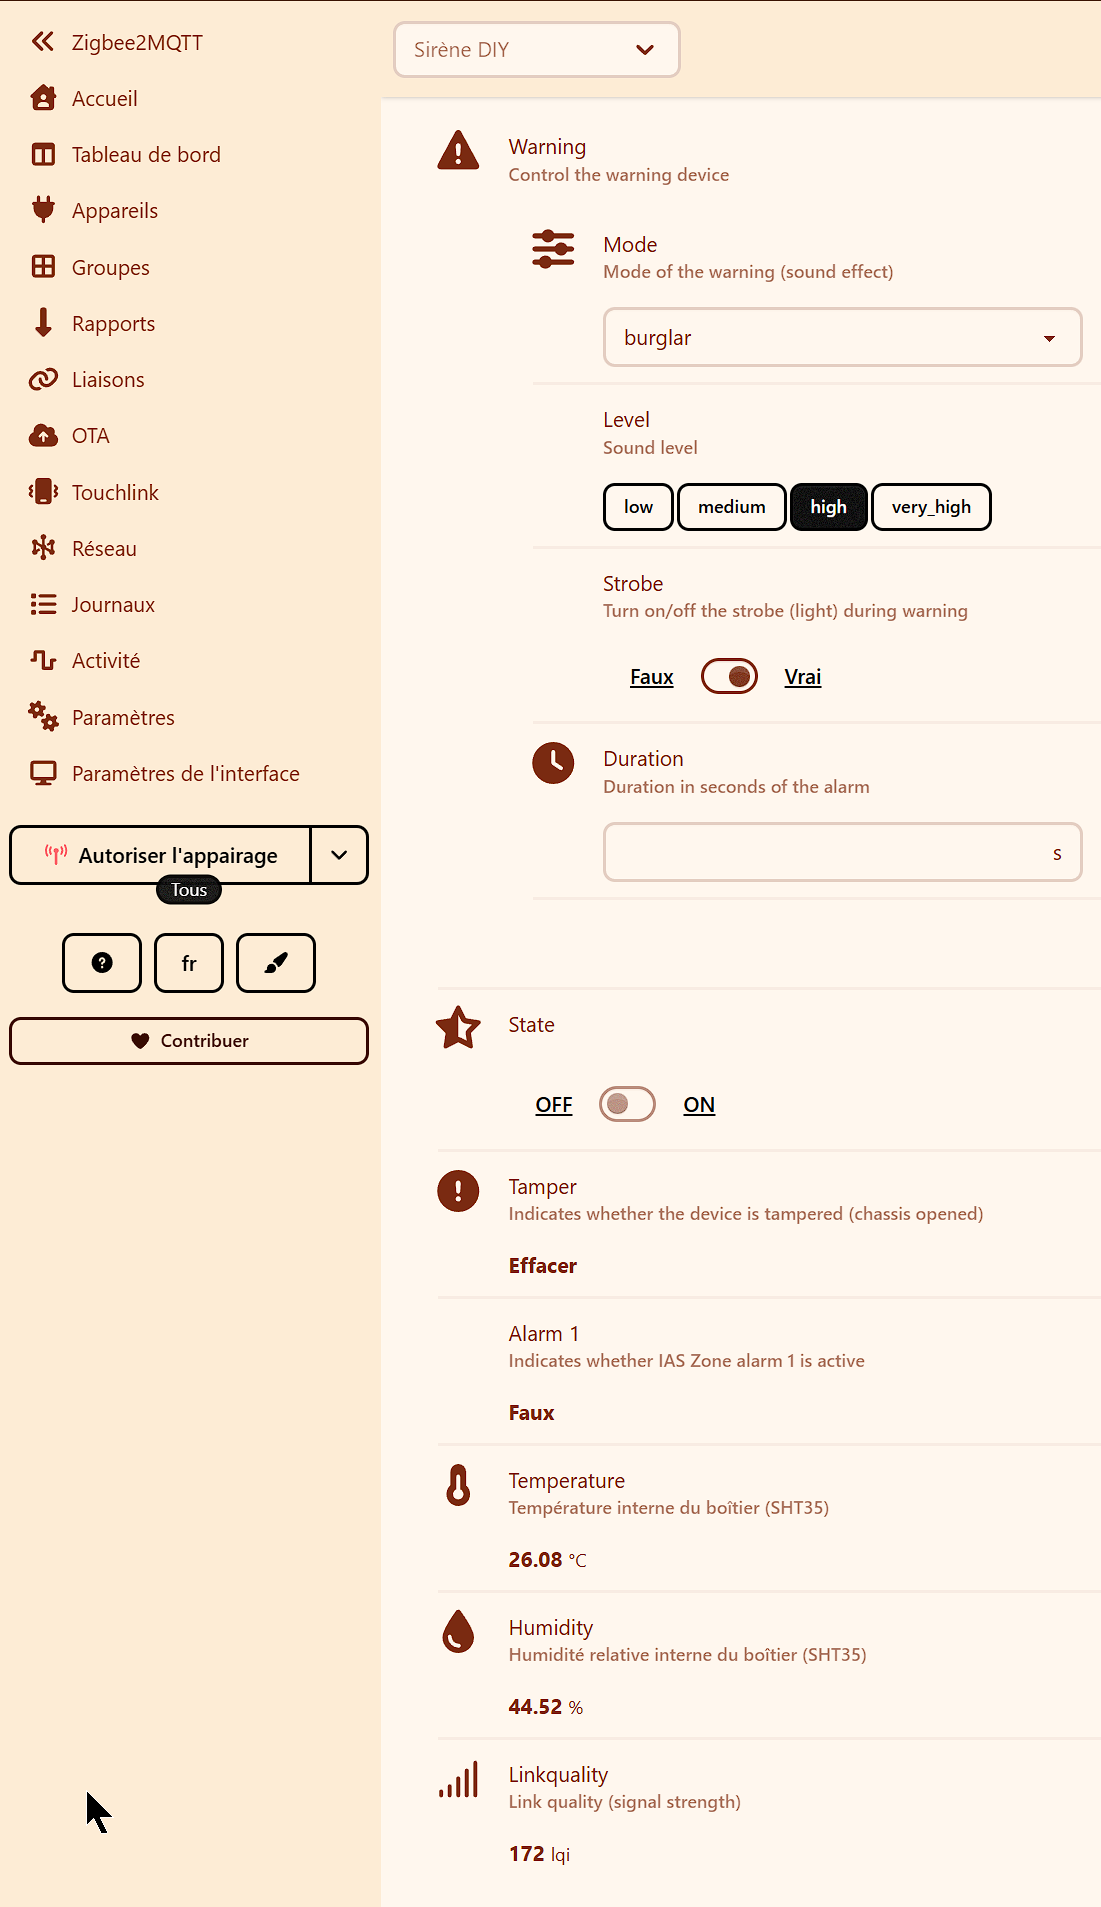
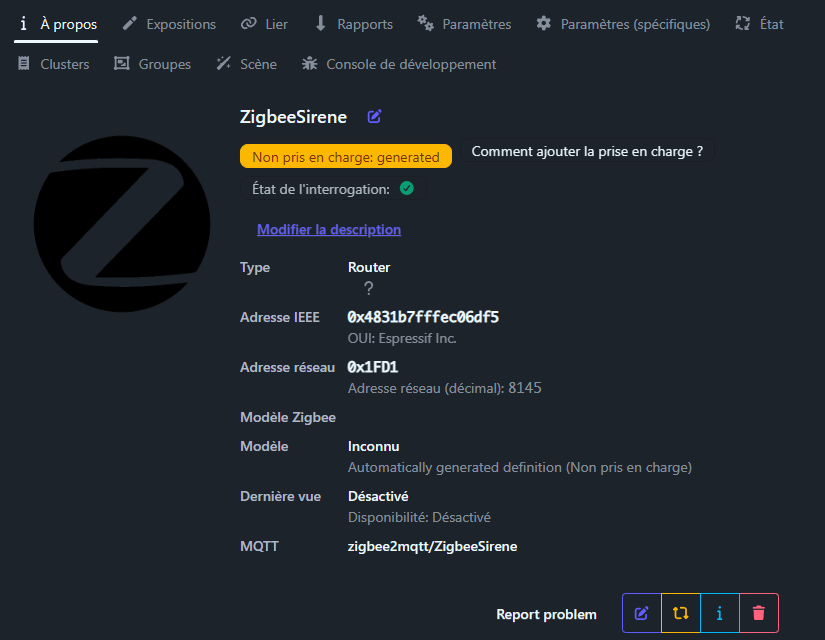
2. Zigbee2MQTT / ZHA : L’appareil est reconnu immédiatement. Il est conseillé de le renommer « Sirène Alarme » pour faciliter l’intégration. Vous pouvez modifier les définitions de chaque composant pour rendre le projet plus pratique. le contact temper ce fait sur alarm 1 et alarm 2 en même temps.
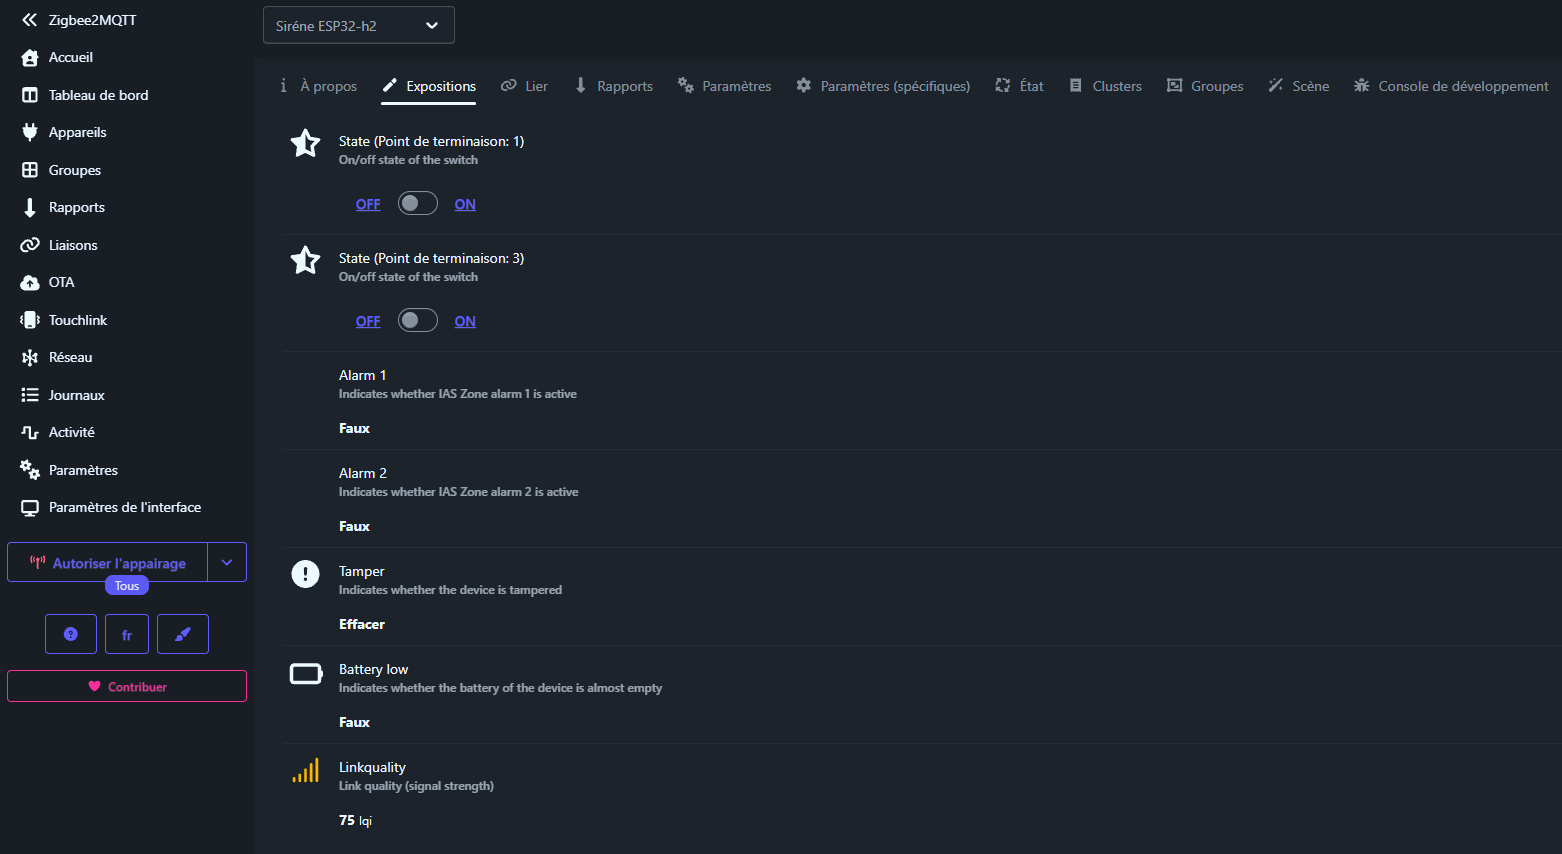
3. Configuration Alarmo :
- Sensors : Ajoutez le
Contact Switch(Endpoint 2) comme capteur de sécurité. - Actions : Liez l’état « Armed » d’Alarmo à l’Endpoint 3 de la sirène pour le retour visuel.
- Sirens : Liez l’Endpoint 1 à l’activation de l’alarme.